Getting RADIUS authentication to work with pfSense and DD-WRT.
pfSense is a pretty easy setup so go over to www.pfsense.org and download the LiveCD with installer and either setup a physical machine or use your favorite virtual machine software to create a test environment. I am using VirtualBox on Ubuntu Linux but since VirtualBox can be easily installed on Windows, Mac or Linux, it’s perfect for quick testing anywhere. In this tutorial, I will be adding a new wireless access point to an existing network that already has a gateway and broadband modem so if something doesn’t work, it wont affect network access for anyone else.
Here is a list of equipment
- VirtualBox 4.1.0 (Under Ubuntu Linux 11.04 Host)
- pfSense 1.2.3 VM (with freeradius package installed)
- ASUS RT-N10+ (rev B1) with DD-WRT v24-sp2 build 16785
1. Install pfsense virtual machine
2. Setup virtual network adapters for pfsense (such as LAN: 192.168.1.10, WAN: 192.168.1.11)
3. Log in to the pfSense webUI (http://192.168.1.10) and install the freeradius package located under the menu System -> Packages
4. Goto Services -> FreeRADIUS
5. Create a new test user with a username and password that will be used by your mobile computer or device to login to the wireless network
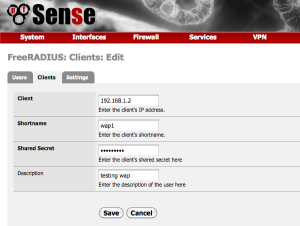
6. Goto the Clients tab and create a new client that will be used to link DD-WRT as a client to pfSense (for my setup, I used the IP address 192.168.1.2 since that is the address assigned to my testing access point) also enter a secure Shared Secret password that will also be entered in DD-WRT
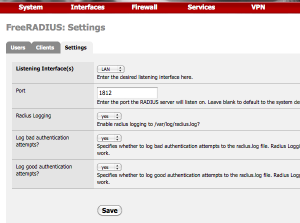
7. Goto the Settings tab and make sure that LAN is selected for Listening interface and note the port number (default: 1812)
8. Login to your DD-WRT router webUI, goto Wireless -> Basic Settings and enter a wireless network name (SSID) such as myRadiusNet
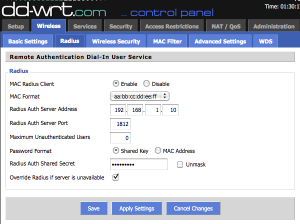
9. Goto Wireless -> Radius and select the following options in the screenshot while using the Shared Secret password you entered earlier into pfSense
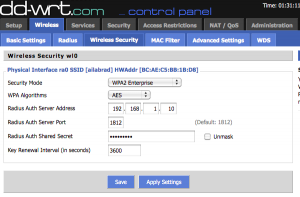
10. Goto Wireless -> Wireless Security and select the following option in the screenshot while using the pfSense LAN ip address that you setup previously.
11. Save and Apply all of your settings and then try logging into your new radius wireless network.
Troubleshooting
If you get login failures or rejected login messages try looking at the pfsense radius log first to see if dd-wrt is at least trying to authenticate.
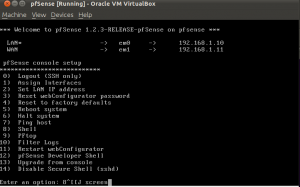
Login to the pfSense shell with option 8)Shell
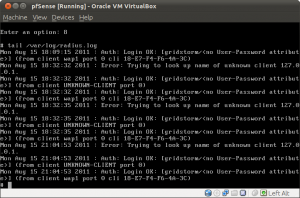
then show the radius log with the following command
tail /var/log/radius.log
You should see a line like the one at the bottom that contains something like “Auth: Login OK:” If you don’t see anything in this log then you likely have a problem with DD-WRT. If you are sure that you have the configurations correct than the first thing you should do is reflash your DD-WRT router with a more recent (or a different) build number. That seems to instantly fix the issues I ran into.
As for getting Windows clients to work with freeradius and pfSense. I will save that pain for another post. That issue is related to self signed certificates so if you want this to work quickly then buy a valid certificate online.

